Monday, May 23, 2011

Thankful....


I have said it a million times before, and I will say it again: I am blessed, blessed BLESSED! It never ceases to amaze me, how my Heavenly Father takes care of me every step of the way. Every time I turn around he is showing me how much he loves me. This weekend was no exception.

I had the most wonderful weekend. And it was very much needed--those of you who had spoken with me this past week know that it was a pretty bad week, as weeks go. So many things went wrong and on top of it all, I was coming to grips with some emotions and problems that I am facing personally, in the wake of my chronic illness. I spent the evenings of Thursday and Friday in tears and prayer.

God answers prayer in so many wonderful ways. In the midst of all the soul-searching and emotional pain I was dealing with, God just reached out with others' hands and wrapped his arms around me through them.

The first thing that happened was that I received a lovely gift from a friend of mine across the country. I read the card and cried--it said the sweetest, kindest most uplifting things about me. That in itself raised my spirits right there.

But God did not stop there...

My parents surprised me by coming up to spend the weekend with us. My Mom said that she knew I had been feeling terrible over the last few weeks and that I've not been able to do much in the housework department. Here lately, if the dishes are done and the kids' toys are picked up, that's a "good" day around here. LOL But bless her, the woman just took over and helped me clean my entire house from top to bottom. She even scrubbed crayon off the walls where the kids had decided to show their artistic talents and re-organized my pantry for me. She was SUCH a HUGE help to me and it made me feel SO much better. I had been feeling pretty badly lately about not being able to do much around the house and all of this "catch-up" work had really been weighing heavily on me. Suddenly, here it was, all done.

On Saturday, my sister-in-law and her family paid us a surprise visit in which they brought us several great big boxes of food. There was just a ton of stuff, and we had to re-arrange the pantry just to fit it all. It came at just the perfect time...Nick's schedules have been somewhat lacking lately and that just all but filled our need for groceries over the next couple of weeks.

I went out to the porch with my Mother and she gave me some gifts the Great-Grandparents had sent for the children--there were some new outfits, books, stickers and some toys. We were talking about the food and the impeccable timing when I heard a noise. It sounded like a lawnmower, but it was REALLY close. I walked around to the side of the house and there was my next door neighbor, riding her lawnmower through my yard, her kids walking along behind her. I literally burst into tears.

Let me back up here for just a minute and explain why I was so touched by this. We have had the WORST luck when it comes to our yard, this year. The weather and Nick's schedule seem to be clashing horridly--if he's off, it's raining and he can't mow; if it's sunny and nice, he's gone on the road at work. I would love to just mow it myself, but I cannot do it. Last summer, in an effort to "help Nick out since he was gone", I mowed the yard--and I ended up in the ER. I had a SEVERE reaction to the grass--trouble breathing, hives from head to toe and my lips swelled up. I also had a strange skin reaction to the sun--this was actually the "event" that started us on the crazy "auto-immune" roller-coaster. So, yeah, mowing for me is OUT. LOL

Well, fast-forward to a few weeks ago and Nick FINALLY has a day off where it's actually sunny. He got about half the yard done and the mower broke. Ha, just what we needed! He had a friend who had a riding mower that needed a new battery, so he offered to help fix it in exchange for borrowing the mower. The VERY AFTERNOON that they got it fixed, we had yet ANOTHER downpour. And once again, he was due back on the road early the next morning. So, the end result to all this--our yard looked BAD. Everything looked overgrown, the grass was close to a foot tall--or higher, maybe, LOL--BAD.

So back to Saturday evening--here comes my neighbor, on her riding mower. I started crying and went over and told her she didn't have to do that--Nick had actually made arrangements to borrow his friend's mower for the following day. She just smiled and said that God had laid me on her heart, and she knew he was gone on the road, and when he came back he would have only one day off and she wanted him to enjoy it with his family. I hugged her and cried and thanked her over and over again.

I sat down later after everyone was in bed and thought about all the different things that had happened--these gifts I had been given--and how very blessed I am. Even in the midst of all this pain and stress right now, I'm so very very blessed. And I am so thankful...SO, SO, SO, thankful for everything in my life.

My heart was (still is) so very full. I feel God's love all around me, coming through in the smallest of places. I don't deserve it, not one little bit, and yet he just continues to wrap me in that wonderful, peaceful, perfect love. And it never fails--he always seems to know just exactly when I need it the most. HE is SO GOOD. And I'll say it again--I am blessed, blessed, BLESSED! :-)


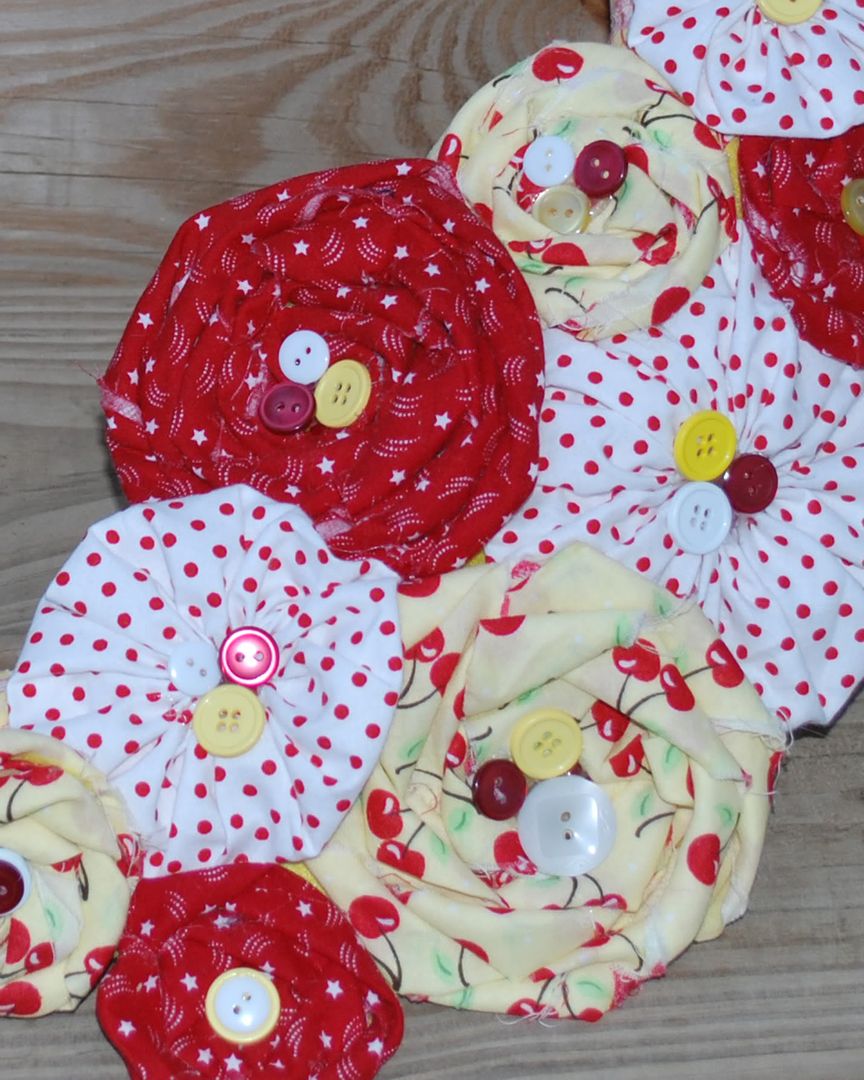
I tend to get inspired and creative whenever something affects me emotionally. So, sure enough, last night I had that "feeling". I sat down with my sewing/crafting stuff and this was the end result:


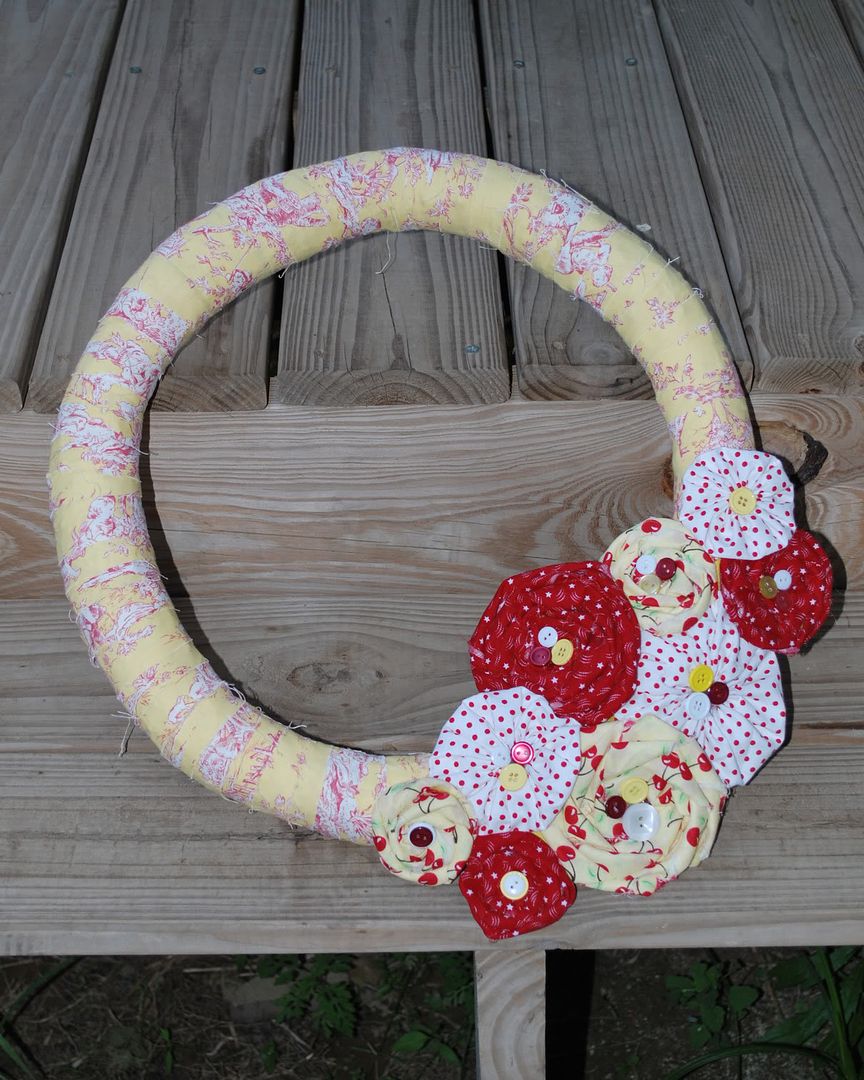
I gave it to my neighbor as a "Thank-You". I loved it so much though that I want to make one for myself now. LOL Maybe that will be my next tutorial... :-)


Blessings,

~Michelle

Tuesday, May 17, 2011

Tutorial: Upcycled Shirt, Part 2: The Dress

Photobucket


As promised, here's how to take that leftover shirt (from my last tutorial) and make it into an oh-so-cute dress for your little lady. It might look a little 'fancy', but don't be alarmed--it's actually fairly easy to do. :-)

You will need:

  • The remaining shirt and sleeve pieces from the last tutorial.
  • OR, an adult size t-shirt--if you're doing this on its own
  • A dress that already fits the child
  • Sewing Machine
  • Thread
  • Pen or Pencil (or fabric pen if you're fancy)
  • measuring tape
  • straight pins
  • Scissors


Step 1

Let's get started. First, make sure the shirt is turned inside-out. Hold it by the shoulder seams so that the front of the neckline falls to it's natural position (a little lower than the back of the neckline) Now, fold it in half lengthwise and press it flat.


Photobucket


Step 2

Cut a strip of 3 inches in width off the bottom of the shirt. Cut that strip into 3 equally wide strips. You should now have 3 very long loops of fabric, each about 1" wide. Cut the 'loops' open so that they become one long strip and set them aside.

Photobucket


Step 3

Fold the child's dress in the same manner as the shirt. Lay the dress on top of the shirt--Line up the neckline of the dress with the FRONT (bottom) neckline of the shirt, and line up the folded edge of the dress and the shirt as well.

Photobucket


Take your pen or pencil (or fabric pen) and trace around the shape of the dress onto the shirt. Leave about 1 inch or so around the SIDES (not the top or bottom) for seam allowance.

Note: If your child's dress is frilly or wider than the shirt, just make a diagonal line from the bottom of the armhole to the very edge of the bottom of the shirt. The dress will still have PLENTY of room, don't worry. :-)

Photobucket

Note: In this photo, you can see I cut close to the neckline. I did that because this shirt originally was a turtleneck and I cut it off before starting. If you're using any other shirt though, you can use the neckline of the existing shirt as the neckline of your dress--it's already "finished" for you. So when you are tracing your dress shape, be sure to avoid cutting the neckline off if at all possible.

Set the child's dress aside now. Pin lightly around the INSIDE edges of the dress shape and Cut out the dress shape from the shirt. Remove pins. I cut mine a little bit shorter because I wanted more of a tunic top than a dress this time, but for simplicity's sake we will keep calling it a dress. :-)

Photobucket


Step 4

You should now have two pieces to your dress--the front and back.

Photobucket

Take the pieces and line them up at the shoulders, with the RIGHT SIDES of the fabric facing together. Pin and sew them together at the top of the shoulders ONLY.

Photobucket


Step 5

Now for those little extra pieces of left-over sleeve. We'll call them "caps" for now.

There are 2 ways to do the caps--you can do them flat, or you can gather them and give them a bit of ruffle before you attach them to the sleeve. If you want to make plain caps, skip ahead to step 6. If you want to make ruffly sleeve caps, keep reading...

To gather (ruffle) the caps, simply make a long, loose stitch along the inside edge of the cap the inside edge of the cap.


Photobucket


Cut the tail threads a little long when you free it from the machine. Take the tails on the LEFT END of the cap and tie them into a tight knot. You might want to knot it more than once just for good measure. Now, Grasp the bobbin tail thread with your right hand and pull it taught. With your left hand, slide the fabric toward the left, away from the thread tails. Keep pulling the tail thread taught and sliding the fabric. As you slide the fabric, it will bunch up, or "gather", creating a ruffle. Keep sliding the fabric back from the end until the amount of 'gathering' you want has been achieved.


Photobucket

Once you have the ruffle you want, tie each set of tail threads into a knot and cut. Repeat with the other cap, and make sure to try and keep the gathering at the same amount so that the caps are the same size.

Note: I cheated a bit here and gave my sleeve caps scalloped edges before sewing them. So if you're wondering why my sleeves look different in the next few pics, that's why. Come to think of it, I think I will do a tutorial later on how to do a scalloped edge...it's actually pretty simple.


Step 6

Ok, back to the caps...Take your sleeve caps and fold them in half, width-wise. Place a pin to mark the fold (center) at the INSIDE edge of the cap. Unfold and lay them flat, leaving the pin as the marker.

Photobucket
Photobucket


Step 7

Turn the "dress" rightside-out. Open out the "dress" and lay it flat so that the neck hole is in the center and the bottoms of the dress are opposite eachother. (Is that clear as mud? See the pic below. LOL )

Photobucket

With right sides facing eachother, lay the cap onto the shoulder of the dress. Line up the INSIDE edge of the sleeve cap with the OUTSIDE edge of the armhole, matching the pin in the center with the shoulder (armhole) seam. Pin in place and sew cap to top of armhole.
>


Photobucket
Photobucket


Turn the "dress" inside-out again. Pin and sew the side seams. Turn it inside out. Hey, now we have a dress! Remember not to sew the armholes shut--I've done that when in a hurry and not paying attention. LOL


Photobucket


Turn the dress rightside-out. Hey, it's beginning to look like a dress now!


Photobucket

Step 8

Now, once again, we come to yet another "optional" part of the dress--"finishing" the armholes. If you want to keep the dress quick and easy, you can leave the armhole edges raw. (Knit fabrics just roll, so it won't fray) If you're leaving the edges raw, skip down to step 10. If you want to finish the edges of your armholes, read on...


To finish the armholes:

First, you're going to need just a bit more material, so check your scraps from the cutting earlier. You should have enough to make two 3/4 inch wide strips that are about 10-12 inches long. If you don't have enough scraps, cut another thin strip off of both the bottom and top of the dress. (Make sure you take the same amount from both ends or it won't line up evenly later.)

Photobucket

Take one strip, and line up the end of the strip with the bottom of the armhole. With the RIGHT SIDES of the fabric facing together, line up the edge of the strip with the outside edge of the armhole. This strip will go on TOP of the cap sleeve, so that the cap is sandwiched in between the armhole and the edging strip.

Photobucket

Pin the entire strip in place, stopping about 1 inch from the end. Overlap the starting end of the strip about 1/2 inch. Fold the remaining end of the strip under and pin it close to the fold. Trim the excess strip to about 1/4 inch or so. Finish pinning the armhole. (Once again--if this is clear as mud, just see the pic below. LOL) Once it's been pinned in place, carefully sew it all the way around--about 1/4 inch from the edge.

Photobucket

Remove the pins. Now, take the free edge of the strip and fold it back down into the underside of the armhole, so that the seam and cap sleeve are facing outward. Smooth/stretch the strip to conform it to the shape of the armhole and pin it in place every two inches or so. (See the picture on the left below)

Once it's pinned, turn and smooth the armhole so that the good side of the fabric/armhole is facing you. sew all the way around, about 1/4 inch from the edge. This makes the armhole edge look nice and finished. Repeat with the second armhole.

Photobucket
Photobucket

Step 9

Now, we're going to get frilly. Take one of the 3 strips of fabric you cut at the beginning. The same technique we used to gather the sleeve caps will be used here to gather (ruffle) the strip. In case you skipped it, I'll do a quick re-cap:

Sew a long, loose stitch down the center of the entire length of the strip. Tie a tight knot at the left end of the strip. (Secure it more than once to make sure the fabric doesn't slip past it.) Grasp the bobbin tail thread from the RIGHT end of the strip and pull it taut. With your left hand, Gently slide the fabric back away from the end. (toward the left) Keep sliding the fabric until it bunches up and creates a ruffle. Once you have acheived the amount of ruffle you want, tie the tail threads into a knot at each end and cut. You now have a long ruffled strip. Repeat with the second strip.

Step 10

Here's the fun part--adding these ruffalicious frills to the dress! Pick up the first strip. Starting at the center of the back of the dress, line up the CENTER of the ruffle to JUST BELOW the edge of the neckline. Place a pin or two to hold it and take it over to the sewing machine.

Photobucket

Make a small starting stitch and grasp the tail threads at the back of the machine. Pull gently to keep guiding the strip back. As you sew the strip onto the neckline, stretch JUST THE NECKLINE out a good ways. Don't stretch the ruffled strip, JUST the neckline underneath it. This will make sure that the neckline AND RUFFLE will both stretch to fit over your child's head.

Photobucket

Once you get to the end, turn the edge under a bit and pin so that it overlaps the beginning end of the strip. If the strip is too long, cut it off about 1/4 inch past the pin. (Make sure you pin it before you cut--if you don't, the ruffle will unravel--ohnoes!) Finish sewing the end of the strip to the neckline. Test the stretchiness of the neckline. Both neckline and ruffle should stretch quite a bit.

Now you have a dress with an adorably rufflicious (I'm really liking this word!) neckline.

Photobucket

But we're not going to stop there--this dress needs just a tiny bit more frou-frou, don't you think?


Step 11

Take the remaining 2 strips and pin them together at one edge, right sides facing each other. Sew them together about 1/4 inch from the edge.

Photobucket

Repeat the same process you used earlier to gather this super long strip.

Again, starting at the center back, pin the ruffled strip close to the bottom edge of the dress. Pin the ruffle all the way around the bottom and then pin/fold the strip to overlap the starting end, just like you did before. Sew the ruffle to the dress--go directly down the middle of the ruffle, along the same line you stitched for the gathering step.

Photobucket


Step 12

Remove the pins...aaaaand...you're done! Fastest step ever, right? :-)

Now you have a sweet little dress to match the leggings we made earlier.

Photobucket


Here's some more pics of the entire outfit in action. Excuse the messy face; Mommy was in a hurry to get some photos of the outfit and overlooked the fact that my princess had just finished eating a fudgesicle....LOL.

Photobucket


Photobucket


Photobucket

I hope you have enjoyed this tutorial. If you like it, I hope you will show your friends. And keep checking back, I'll be posting lots more! Sew Happy!


~Michelle

Monday, May 16, 2011

Tutorial: How to Upcycle an Adult Shirt into Infant/Toddler Leggings

Photobucket


If you know me, you know I'm always looking for ways to make something old into something new. These days, with the economy being in the state it has been, it's important to save money on everything. In in my case, with 3 little ones, that ESPECIALLY goes for kids' clothes.

So, in this tutorial, I'm going to show you how to take an adult's shirt and turn it into a pair of leggings for your little one.

Now, this tutorial only requires the sleeves of the shirt, so later on I will be including a second one. For that tutorial, I will show you how to use the remaining part of the shirt that you just cut up (Waste not, want not, hehe! ) to make a remaining tunic/dress to match the leggings.

Bear with me, as this is my first tutorial. And feel free to leave questions, comments, criticism--I'm always open to suggestion.

So, without further ado, here you go. Enjoy it! :-)


How to Upcycle an Adult Shirt into Infant/Toddler Leggings


You Will Need:

  • Adult size long sleeve shirt, made of stretchy knit material
  • Pair of leggings or that already fit the child
  • Sewing Machine
  • Thread
  • Measuring tape or ruler
  • 1 yard of elastic at least 3/8 inch wide, but no wider than 1"
  • Scissors
  • Pen or Pencil
  • Straight Pins
  • 2 Safety Pins


Step 1:

Cut the sleeves off of the shirt at the armohole seam. Set remaining shirt aside.


Save the rounded pieces that you cut off the top of the sleeve--set them aside with the rest of the shirt. They will be used later.


Step 2:

Take the child's leggings or pants and fold them in half longwise. Press the crotch fold out away from center to make it visible, as seen in the picture below.


Step 3:

Turn the sleeves inside out.
Line up the sleeves in the same direction and lay them on top of eachother.


Lay the child's leggings (or pants) on top of the sleeves, with the outside fold of the pants lined up with the outside fold of the sleeves.


Step 4:

Trace the shape of the inside seam of the child's leggings onto the sleeves, *leaving about an inch or so for seam allowance.* At the top, leave about 3 inches or so for seam allowance and casing.


Step 5:

Place a few pins around the INSIDE edge of the pants shape to hold it together. Cut the pants shape from the sleeves and remove pins.


Step 6:

Pick up the first pant 'leg' and line up the edges and bottoms. Pin lightly to hold shape. Sew the inseam--from the bottom of the pant leg to the beginning point of the crotch.


Use a 3/8 inch seam allowance and remember to stretch the fabric lightly as you sew. Repeat with other pant leg.

Step 7:

This part is kind of tricky. Take one pant leg and turn it right side out. Insert it, right sides together, into the other pant leg, lining up inseams.


Step 8:

Pin along the crotch seam (the u shape at the top) and sew it together, leaving a 3/8 seam alowance of 3/8 inch. I like to sew a second time back through the crotch seam for extra reinforcement.


Step 9:

Turn the pants inside out. Take the elastic and measure around your child's waist. Tighten the elastic to how snug you want the waist to fit . Use a pen to mark a line on the elastic where the other end overlaps. That will be your elastic guide. Cut the elastic about 1 inch past that line.

A little tip: For those of you whose child is squirmy like mine and hard to hold still for measurements, you can use the pair of pants or leggings as a guide.

Just fold the old pants in half, and fold the elastic in half. Line up the fold of the elastic with the inside fold of the pants. Draw a line on the elastic about one inch past the waistline of the pants--that will be your guide. Cut the elastic about 1 inch past that. Continuing on:

Step 10:

Now for the casing: Lay the pants out flat, still inside out. Take the top edge and fold down (toward you) about 1 inch to form the casing. Pin in place every inch or two to secure the casing and sew, leaving an opening of about 3/4 inch.


Step 11:

Last step--adding the elastic. You're on the home stretch! (Haha, get it? "Home stretch?" Oh, I kill myself sometimes...)

Secure a safety pin to each end of your elastic length. Attach one end of the elastic to something to use as an anchor--I normally use my pants leg.

Here's an important tip: Anchoring one end of the elastic makes sure that end doesn't go sliding into the casing--because then it's a complete pain in the butt to pull back out. You'll wind up having to pull it all the way through and start over. I I learned this the hard way. LOL!


Take the other end of the elastic and feed it into the opening and through the casing, all the way around and back out the same opening. Use the safety pin to help guide the elastic through.

Lightly feel with your fingers along the casing, making sure the elastic isn't twisted inside. Smooth it out as best as you can without drawing the ends back into the casing. Remove the safety pins from the ends. Lay one end of the elastic on top of the other, lining up the end with the guide mark you made earlier. Pin and sew it in place at either end of the overlap.


Step 12:

You're almost done! Now, GENTLY stretch the waistline/casing all the way out so the sewn end of the elastic slips back into the casing.


Pin the opening and sew it closed, lining up with the stitching on the rest of the casing. Tie off threads and cut. Turn the leggings rightside-out. That's it, you're done!


Step 13: (optional)

Go get your little one and try the pants on them. Admire your work, pat yourself on the back and take pics of your marvelous achievement! ;-)

Here are some photos of my lovely Gabba modeling the finished product:


I hope you have enjoyed this tutorial. Look for the second part--the dress--coming soon to a blog near you! :-)